Products > Car Imaging > IH30-PCM31


The ImageHub30-PCM31 can drive a integrated PCM 3.1-/Navi- display in Porsche vehicles with PC graphics and video signals in combination with a ImageCutter30. For this a ImageHub30-PCM31 draws from the ImageCutter30 a vehicle display tailored signal, according the timing and format, and feeds it digitally inside the PCM 3.1 unit. For security reasons it can switch between the fed and the original display to show emergency messages.

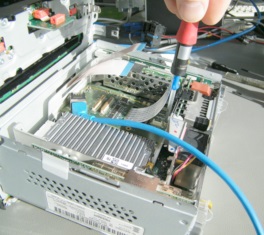
The ImageHub30-PCM31 has been developed precisely for installation inside the PCM 3.1 and draw power from this unit. To integrate the ImageHub30-PCM31, please send us the PCM 3.1 unit.

The transmission of signals from the ImageCutter30 to the ImageHub30 is via standard patch cables. The signals are transmitted AC coupled to compensate possible ground loops and voltage differences.
Particular features
  • Multiplexing between original image and PC/Video image
  • DC De-coupling of ImageHub30 and ImageCutter30
  • Obtains supply from ImageCutter30
Order Data: 1EMIH30-PCM31

Selected configuration:

Vehicle Display unit
Model: Porsche Cayenne
Type: 958 (E2)

Time frame: 2010...2014
Name: PCM 3.1
Display size: 7"
Resolution: 800 x 480 pxl
Technology: IH30 inside Navi (digital RGB)


Documentation: Data Sheet
Configuration file: VTI Config file
Tool for configuration: VTI tool

Installation guidelines VTI tool

To configure the ImageHub30 for a specific type of car, follow the steps below:


  1. Make sure that the ImageHub30 is connected to the ImageCutter30 and that the ImageCutter is provided with power supply.

  2. Connect the RS-232 interface of the ImageCutter30 with the RS-232 port of your PC.

  3. Download and extract the files of the Zip-Archive and start the configuration tool VtiConfig.exe

  4. Under Communication, select the COM port where the ImageCutter30 is connected to

  5. Download the configuration file for the appropriate type of car. Please make sure that you have the fitting variant of ImageHub30. The configuration file can be found in the car-specific description, which is listed in the compatibility list.

  6. Load the configuration file with the Load/Save button

  7. At the Communication tab, press the Button Write to VTI.


For more information to the VtiConfig tool, read the Manual of the VtiConfig tool which can be found in the Zip-Archive.